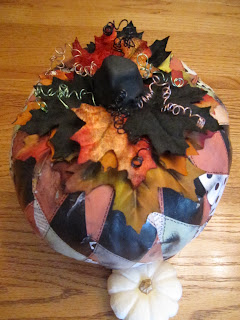
Today I'm sharing a pumpkin that I had started last year before Halloween, but didn't finish it so I put it away. I had forgotten all about it until I went to get my Halloween decorations out this year, and there it was, so I thought I should probably finish it. I'm sure I wasn't planning on finishing it the way I did. I've noticed that on lots of my projects that I don't like or finish, if I put them away (not usually for a whole year lol), when I go back to them, I have another idea and I'm actually glad that waited to finish them. I'm really glad that I waited, because I'm very happy with how it turned out! Let me know what you think?
Recipe: Plastic pumpkin
Card stock cut into diamonds and put on with modpodge
Sanding and various inks to make it look distressed
Flowers from Michaels that were orange & yellow (very boring), so I used various Tim Holtz Alcohol Inks, ink pads & black paint to jazz them up. Used hot glue (black by MS) to adhere them.
Paper clay that I added lots of black paint to, made base at the top & the stem, which after drying I put a few coats of black paint on.
I twisted different colors of 22 gage "Fun Wire" and added them to the base of the clay so they would be secure once the paper clay had dried.
GILBY AND I LOVE COMMENTS...HIS TAIL JUST WAGS AWAY WHEN HE SEES ME SMILE!!!
THANKS FOR STOPPING BY!!!


so pretty love it thanks for sharing I am now a follower with you feel free to follow me (I hope you do) Debbie @http://craftydeb-ddscrafts.blogspot.com/
ReplyDeleteOMG, this is a Fabulous altered pumpkin!!! I just love all the great pattern paper you used..
ReplyDeleteScrappy hugs,
Amanda :0)
Cute project! TFS!
ReplyDelete